Real arcade project
From Tired Bartop to Showpiece: A Custom Arcade Retrofit
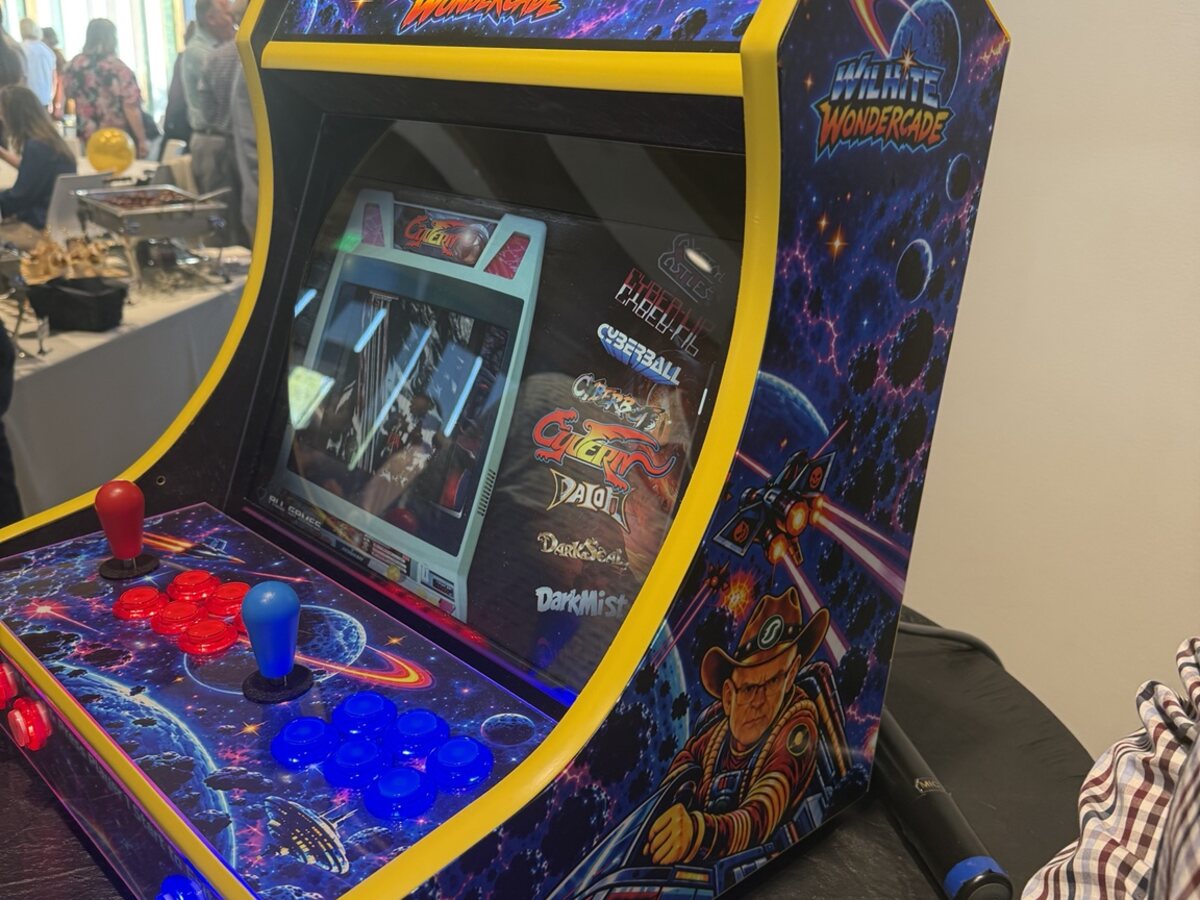
This well-used bar tabletop arcade already had a cabinet worth saving. We renewed the parts players see and touch most: a new control panel, a matching front panel, protective plexiglass overlays, fresh buttons, and a cleaner frame around the display.
- Bartop Arcade
- Control Panel
- Arcade Plexiglass
- Screen Bezel
Renewing an Arcade That Still Had More to Give
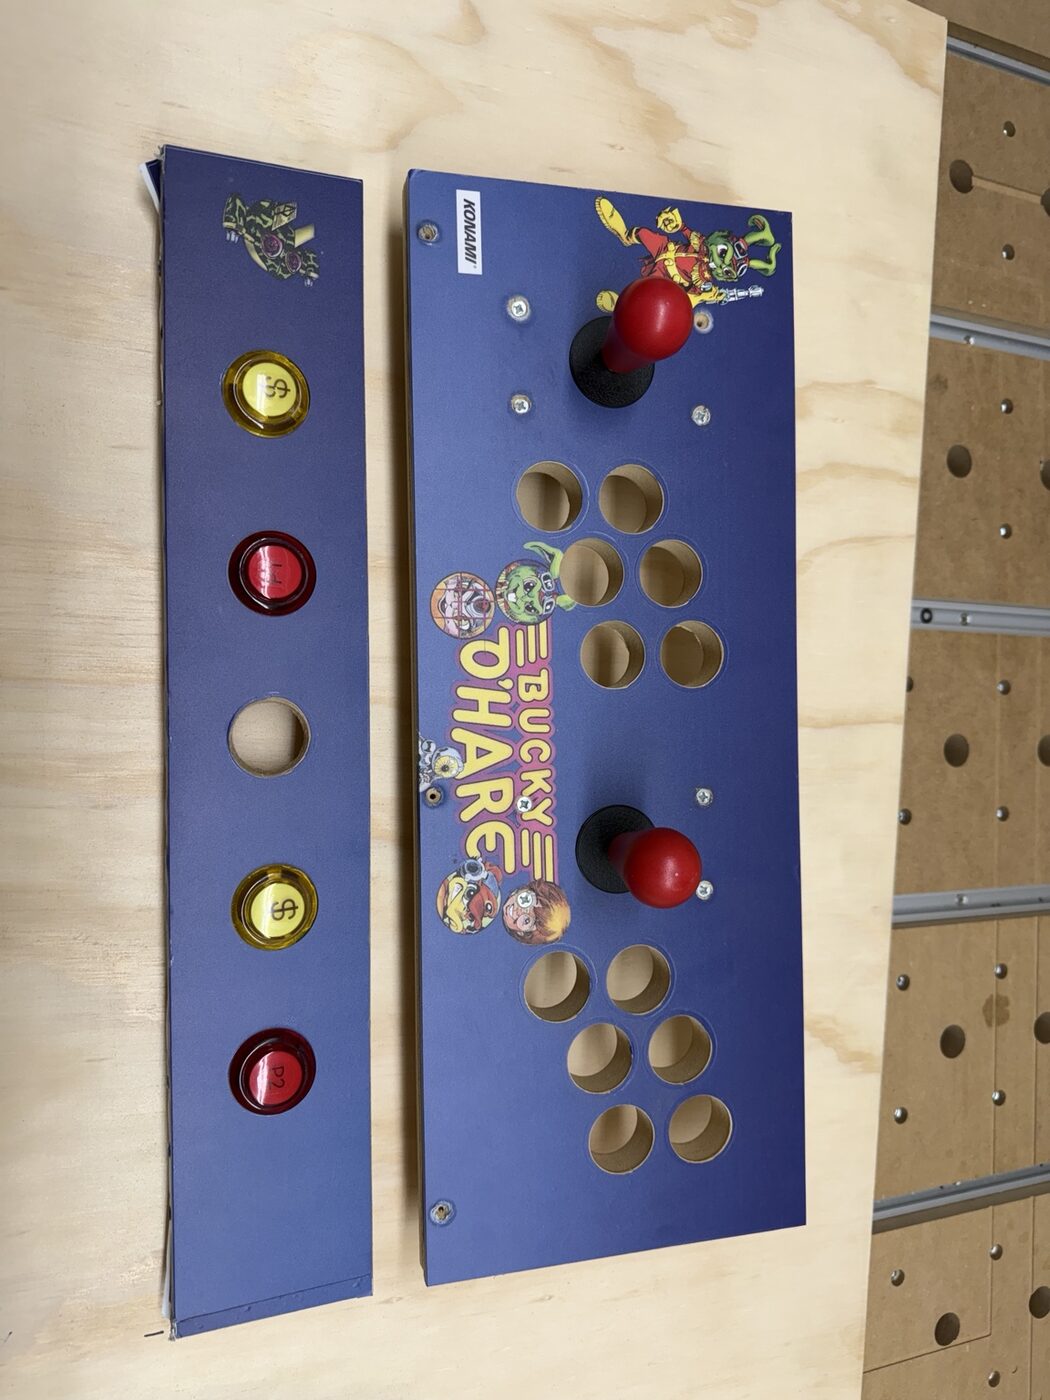
The original Bucky O'Hare control and front panels gave us the reference points we needed, but their tired edges and visible screw holes made the playing area look worn. The goal was to keep the bartop alive while giving its most visible surfaces a deliberate, unified finish.
We removed both pieces and treated them as a matched pair because the control deck and narrow front panel meet in the same sightline. Their outlines, openings, and artwork needed to feel cohesive.
Designing Both Replacement Panels
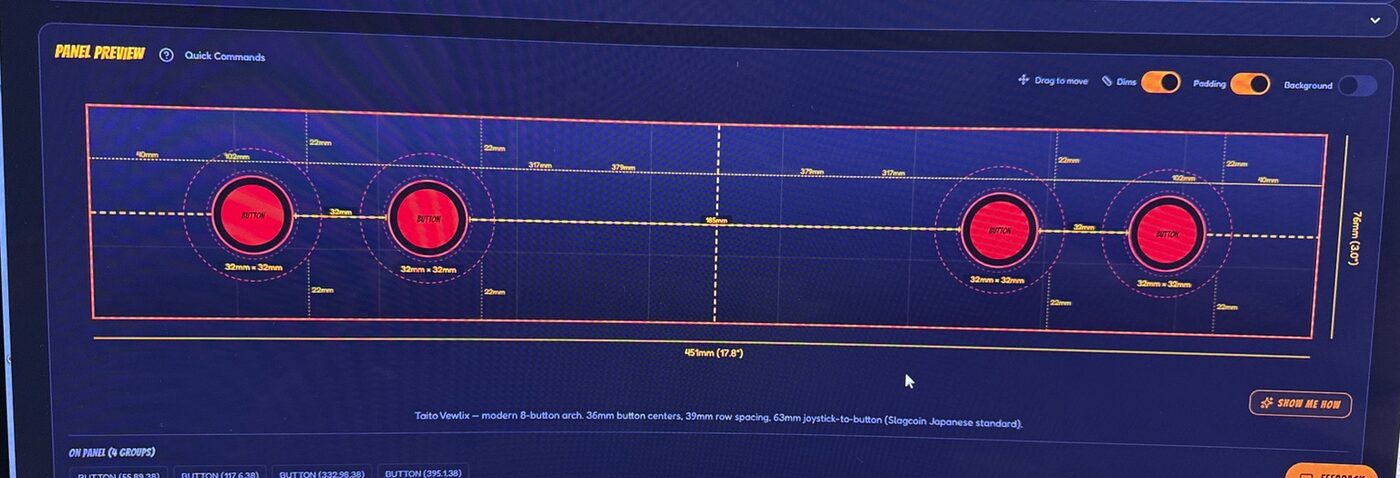
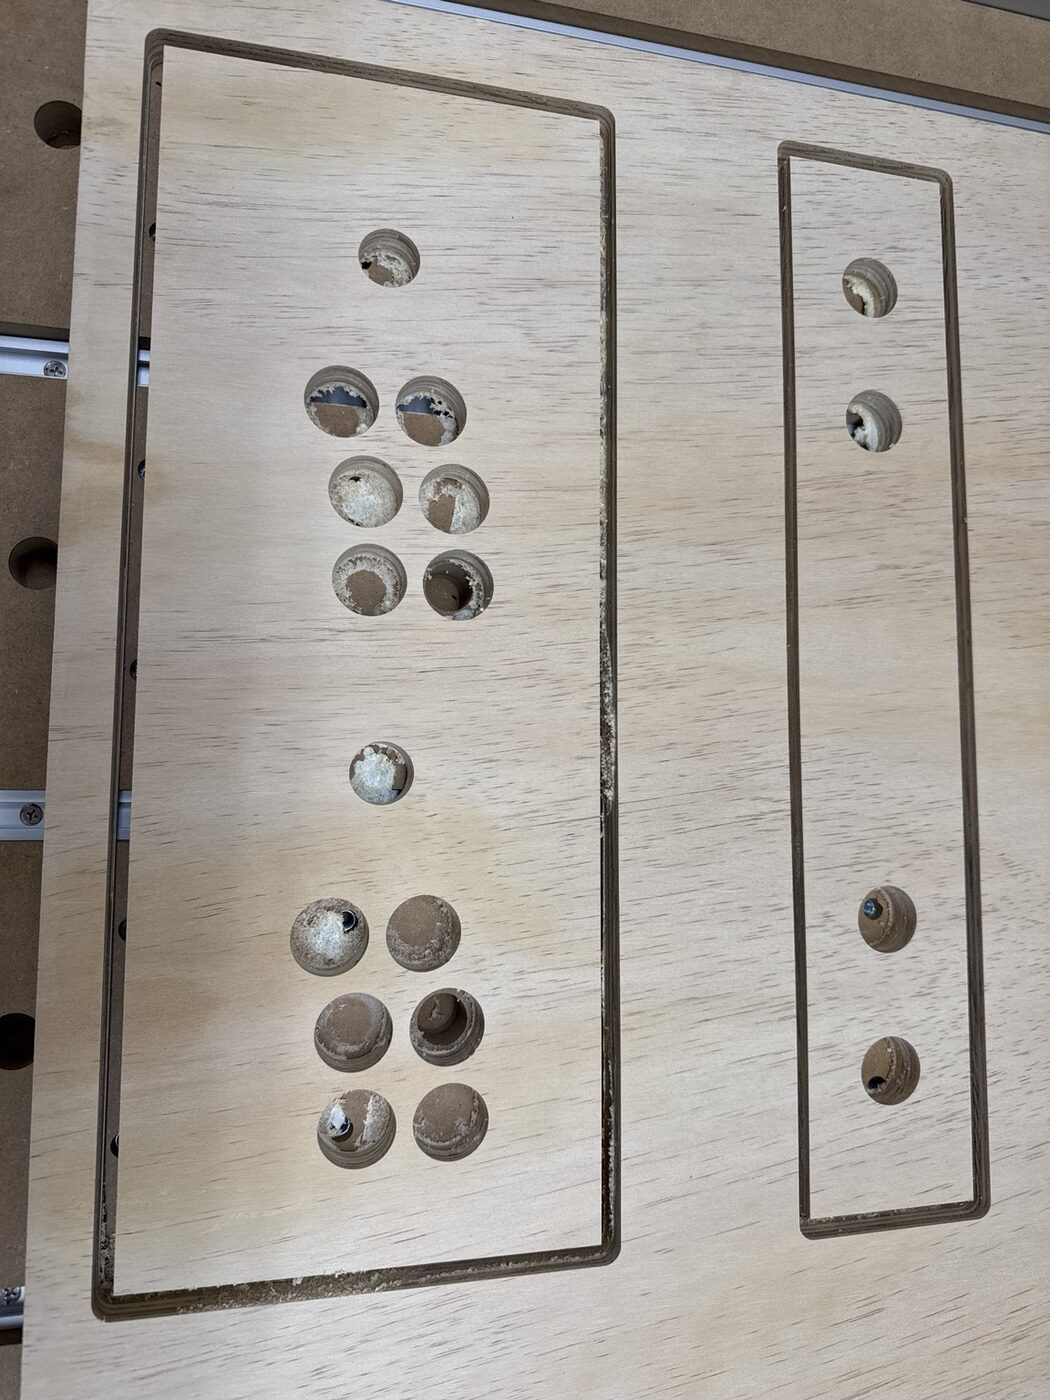
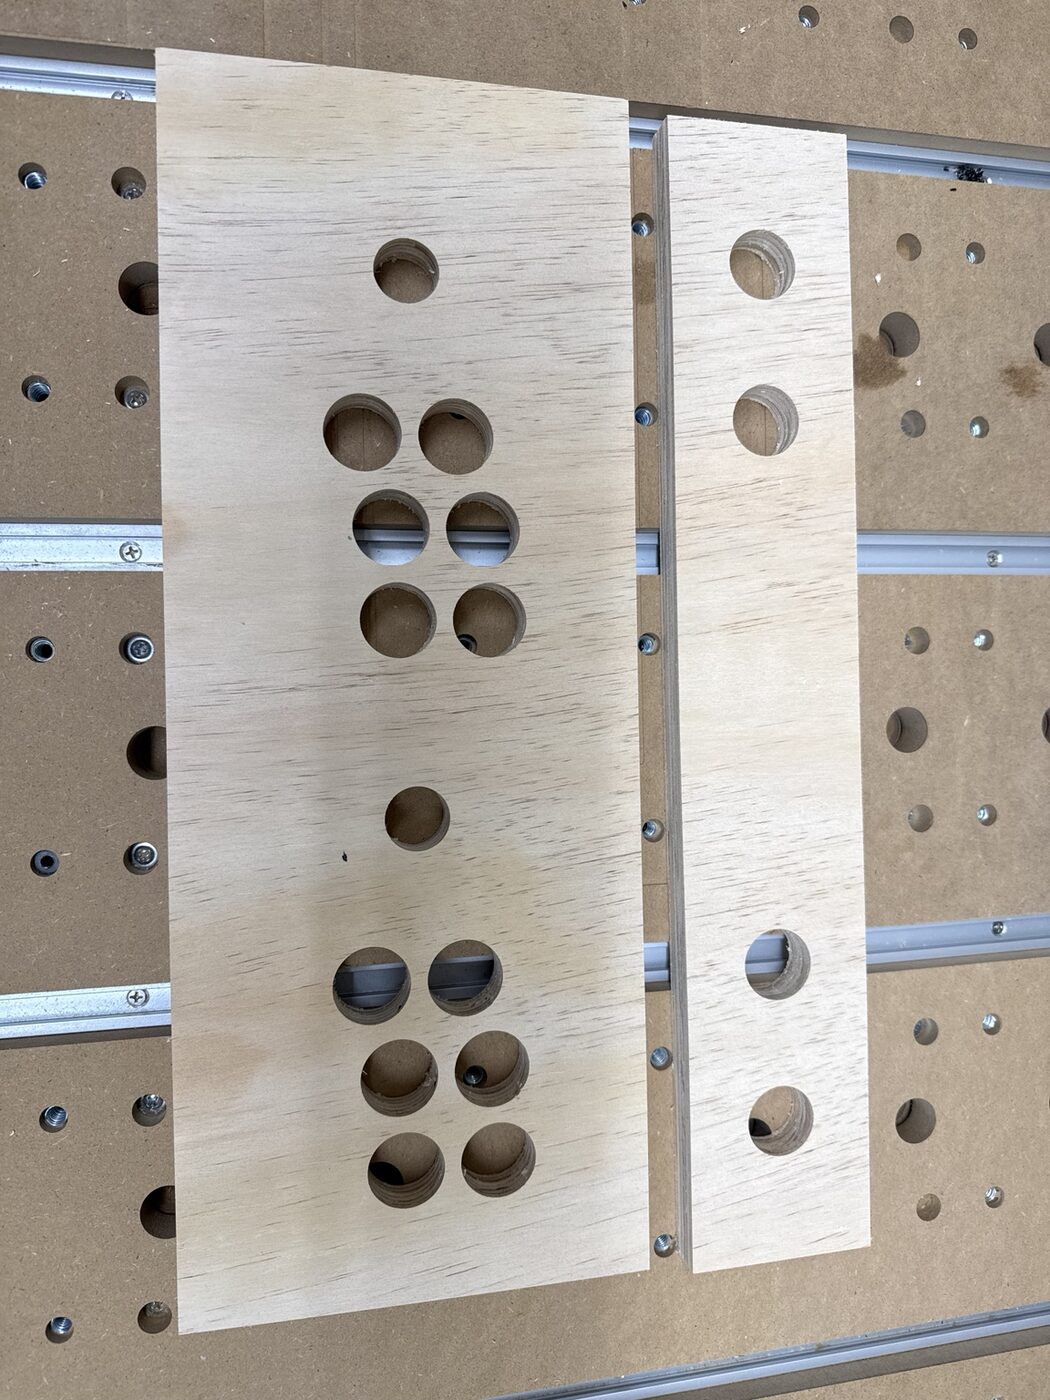
We created the new arcade control panel and front panel with our panel configurator. The control deck needed openings for two joysticks and two player button groups. The front panel needed its own four-button layout. Designing both digitally gave us one clear source for the panel outlines and every opening before any replacement material reached the machine.
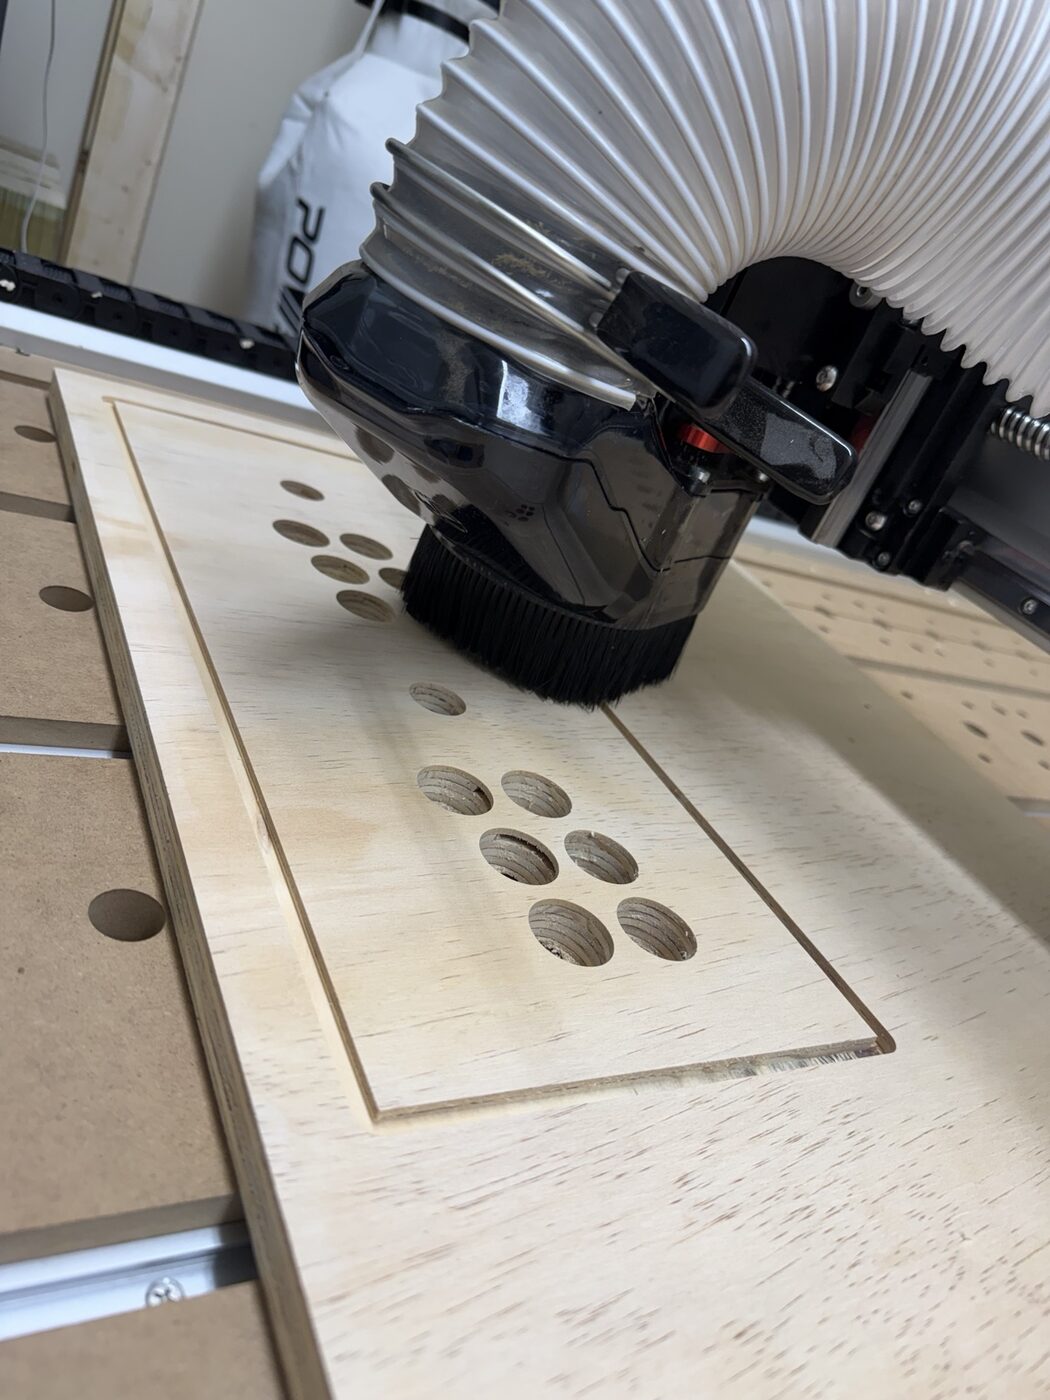
Those layouts then guided the CNC cuts. The progress photos show the control panel being cut, both parts still on the CNC bed, and the clean replacements after removal. The purpose stayed arcade-specific: rebuild the interaction area around the way this cabinet is played.
One Layout, Matching Wood and Plexiglass
The same configurator files used for the wood panels also guided the clear plexiglass overlays. Reusing the layout kept the outer shapes and button openings aligned instead of asking two separately drawn parts to meet by chance. Once placed over the vinyl graphics, the clear layers protected the printed surfaces and added the polished, professional finish we wanted for the renewed cabinet.
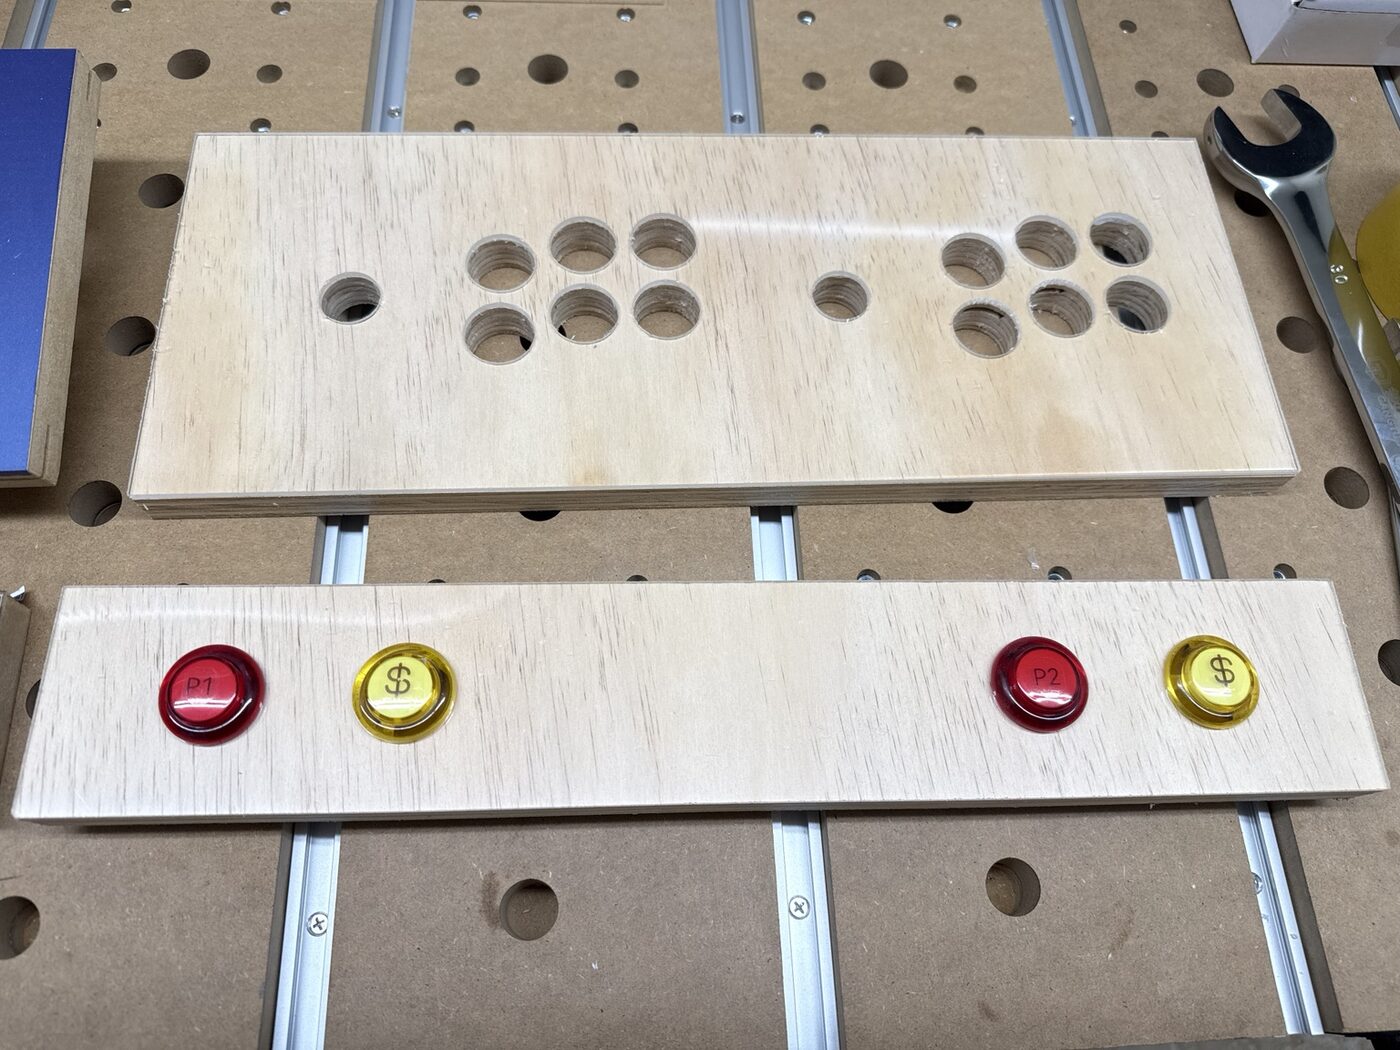
The fit-check photo captures that relationship in progress: clear plexiglass is visible over the wood control panel, while buttons are temporarily fitted in the front panel openings. It documents alignment during the build; it is not a photo of the final control set.
A Cleaner Finish With Dowel Mounting
For this project, we chose dowels rather than screws to hold the replacement pieces to the arcade. That decision removed the old pattern of visible fasteners from the face of the finished panels and let the galaxy artwork read without interruption. It was a project-specific choice made for this cabinet and its new surfaces.
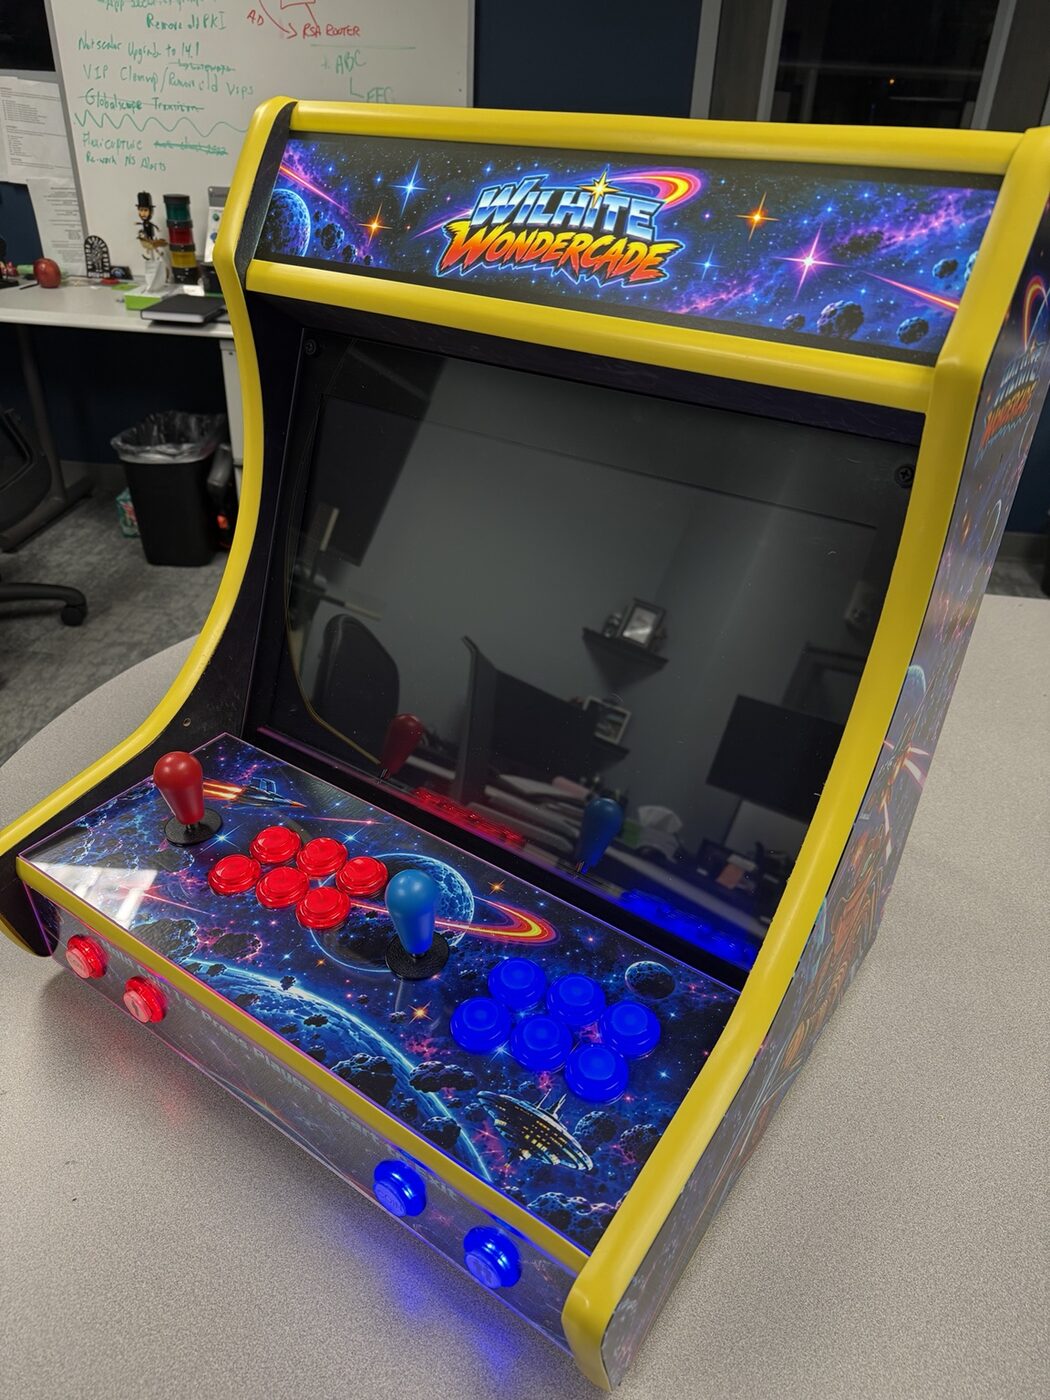
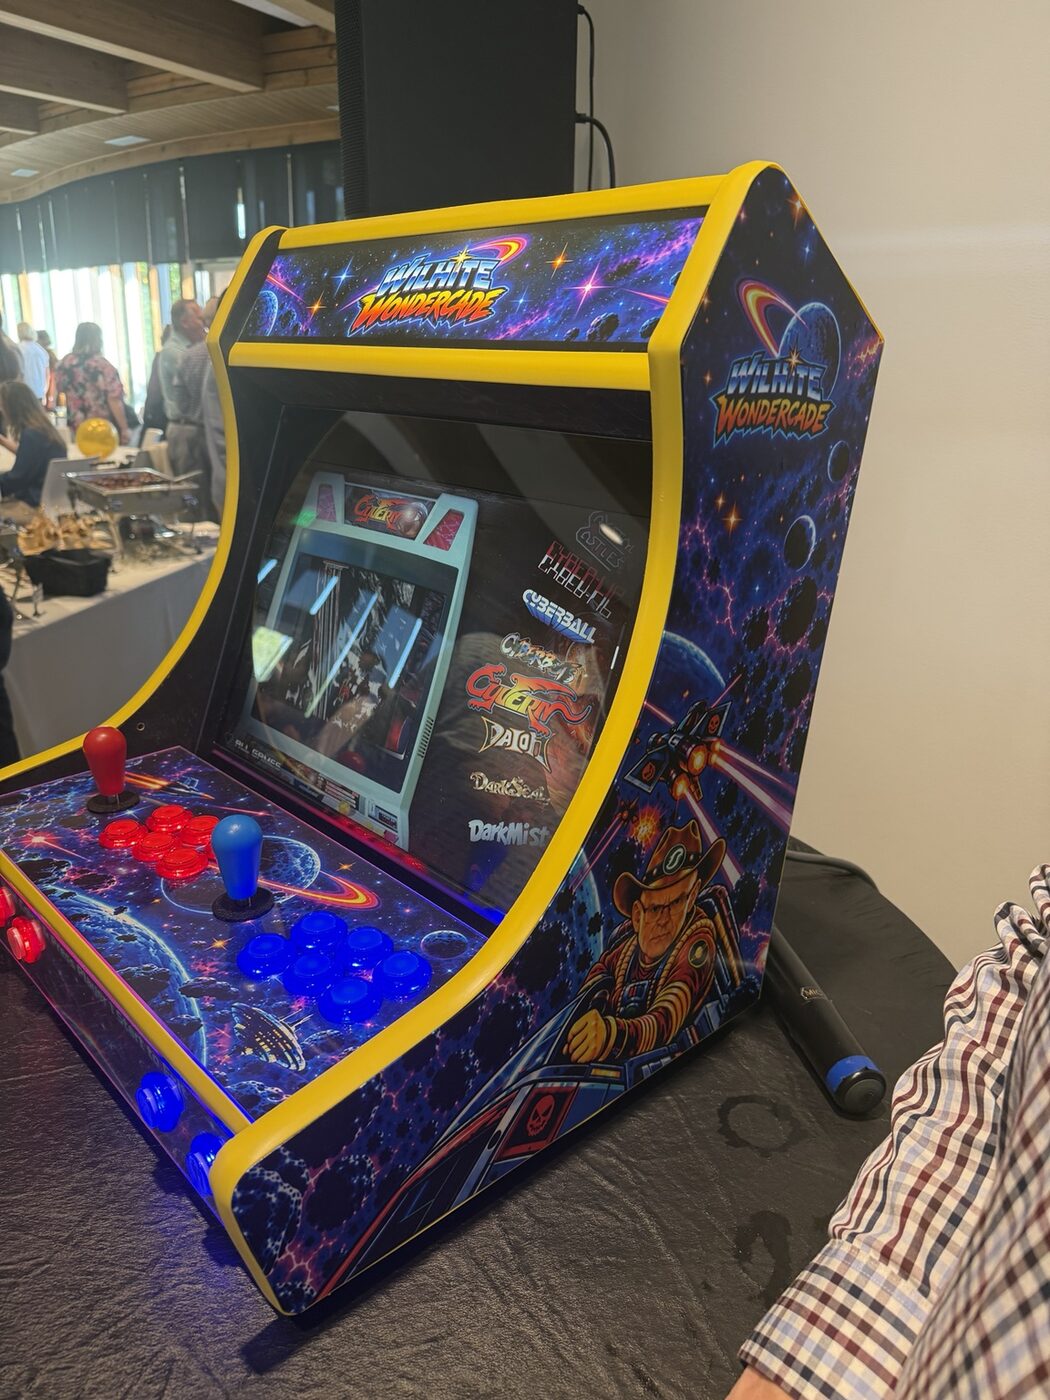
After the panels and overlays were in place, we installed all-new buttons. Red and blue controls now divide the two player positions, while illuminated front buttons continue the color cues below the deck. The close view shows how the new controls, printed graphics, clear overlay, and yellow cabinet trim meet at the front of the machine.
Finishing the Display Area
The lower half of the cabinet was only part of the renewal. We used our mask and bezel configurator to design the display pieces, then cut the plexiglass and an ABS bezel for the screen. In the finished cabinet, the display is framed cleanly within the curved yellow sides and coordinated galaxy artwork.
That final framing matters on a bartop because the display, controls, and marquee are always seen together. The bezel helps the screen feel integrated into the cabinet rather than simply placed behind an opening.
The Final Result
The result was remarkable. What began as a tired bartop with worn panels now presents as a complete arcade again: bright yellow trim, matching space-themed surfaces, a protected control deck, coordinated illuminated buttons, and a display area finished to the same standard as the controls.
Our favorite part is that the transformation came from working with the existing machine rather than erasing it. Careful panel layouts gave the retrofit its foundation, shared files kept the wood and plexiglass aligned, and the bezel brought the screen into the same visual story. It is still the same bartop at heart—only ready to be noticed and played again.
Working on Your Own Arcade Cabinet?
Lay out a panel for free, define a screen mask around your display, or share the arcade part you need with Gary and the team.